HOW TO ADD WALLETS IN XRP TUNDRA
XRP Tundra requires users to add both XRP and Solana wallet addresses to receive tokens. Users must enter self-custody wallet addresses, not exchange wallets, with XRP addresses starting with "r" and Solana addresses in Base58 format

HOW TO ADD WALLETS IN XRP TUNDRA
Before you can receive or manage your tokens inside the XRP Tundra ecosystem, you need to link your personal crypto wallets. XRP Tundra requires users to add both an XRP wallet and a Solana wallet, which will be used to deliver your tokens once the presale or transaction process ends.
Here's how to add your wallets correctly and avoid common mistakes.
Step 1: Log In to Your Account
Go to the
XRP Tundra websiteand log in using your registered email and passwordIf you don't have an account yet, click "Sign up here" on the login page to create one

Step 2: Go to Your Dashboard
Once you're logged in, navigate to your Account Dashboard *Here, you'll see your profile information — including your username, email, referral link, and wallet section
Step 3: Click "Add Wallets"
Under your account overview, click the Add Wallets button *A new window will open where you can enter your wallet details for both XRP and Solana

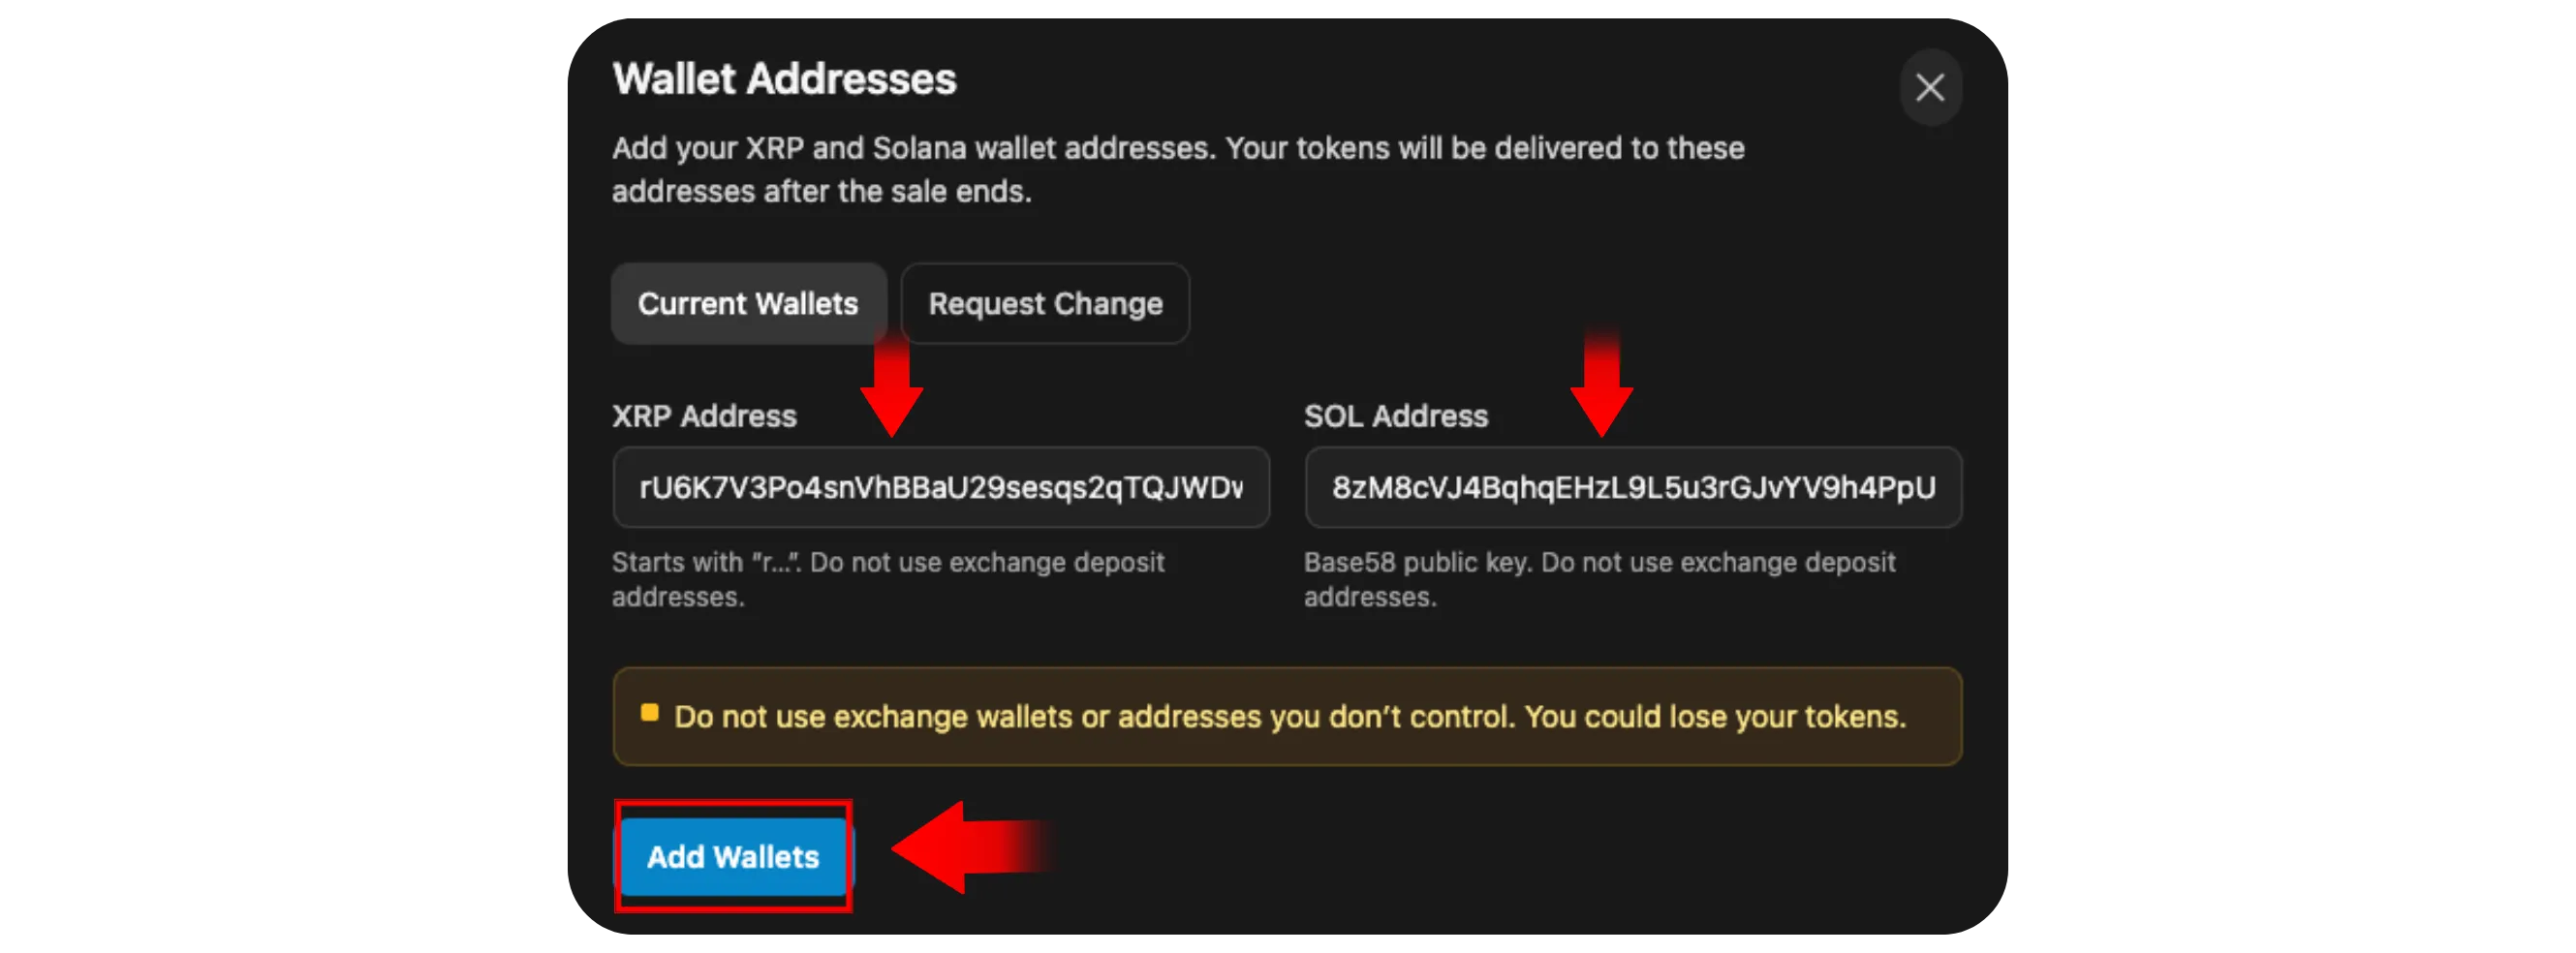
Step 4: Enter Your XRP and Solana Wallet Addresses
You'll find two input fields:
XRP Address
SOL Address
Enter your wallet addresses carefully *These are the wallets where your XRP Tundra tokens will be delivered
Important Tips and Warnings:
Do not use exchange wallets. Only use wallets you fully control (for example, Xumm for XRP or Phantom for Solana)
Do not use ERC-20 or EVM addresses. Addresses starting with "0x" are not supported for XRP or Solana and will result in lost funds
No spaces or extra text. Make sure the wallet address is pasted cleanly without spaces or invisible characters
XRP address format: Should start with "r" (e.g.,
rU...)Solana address format: Should be a Base58 key (a long string of letters and numbers)
Always double-check the address before confirming
Step 5: Confirm and Save
After verifying your wallet addresses, click Add Wallets to save them to your account
The system will confirm that your XRP and Solana addresses have been linked successfully
Once added, your wallets will appear under your profile section, and your tokens will be sent directly to these addresses once distributions begin.
Final Notes
Adding your wallets in XRP Tundra is a quick but crucial step in ensuring your tokens are sent safely and directly to you. Always make sure that:
The wallets belong to you (not an exchange)
The addresses match the correct network (XRP or Solana)
You keep a secure backup of your wallet credentials
By following these steps carefully, you'll have your wallets correctly linked and ready for future rewards or token distributions in the XRP Tundra ecosystem.